This tutorial is intended for industrial design students at
the tudelft.
Version 1.2 Maya version 5
comments to d.p.saakes@io.tudelft.nl
© Daniel Saakes, TUDelft 2001 - 2004
All rights reserved.
This tutorial is intended for industrial design students at
the tudelft.
Version 1.2 Maya version 5
comments to d.p.saakes@io.tudelft.nl
© Daniel Saakes, TUDelft 2001 - 2004
All rights reserved.
Download the philips_roller.zip and
unzip it ( with folders : use extract ).
You should have a folder named roller_project which contains a number of sub folders
Start Maya and in the file menu pick project » set
and locate the roller_project. Now open the file with file menu pick open ( nothing happens ). Locate the start_here.mb file in the scene folder. Note that after loading you will still have an empty looking scene; the file contains a few materials that you will need later on.
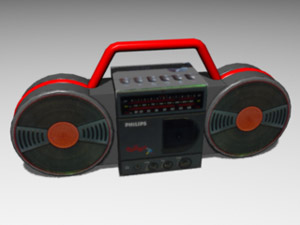
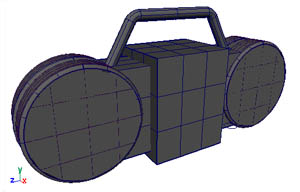
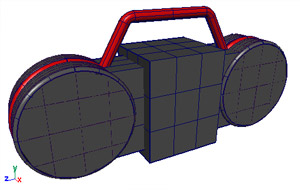
Create a NURBS cube for the center shape and scale it to roughly match the figure.
Set the shading to smooth. In your perspective view choose Panel menu » Shading » Smooth
shade all ( shortcut key 4 and 5 switch from wireframe to shade mode
)
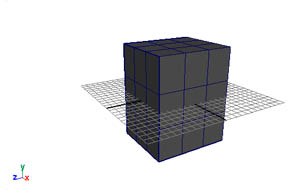
Create a NURBS cylinder and place it next to the cube.
Rotate the cylinder 90 degrees around the z-axis. On the righthand side you'll find the properties of the selected object in the channel box ( on your right or hit ctr-a ).

Set the nurbs smoothness to fine ( use the 1,2 and 3 key )
Scale the cylinder so it matches the figure.
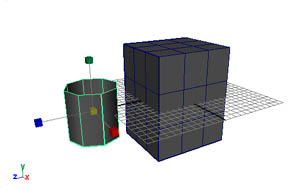
Duplicate the cylinder ( Menu » edit » duplicate
or hit ctr-d ). Make sure in the options that it creates a duplicate and not an instance! Mirror it to the other side. Because the cube
is centered you can mirror it by negate the z-position value in the property window.
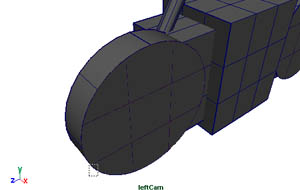
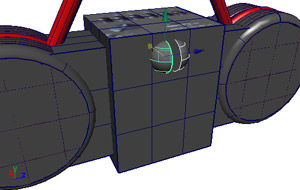
Create a second NURBS cube and scale it so it forms the connection between the cylinder and center cube.
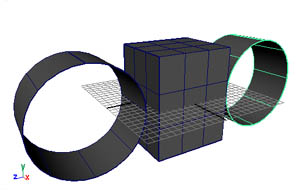
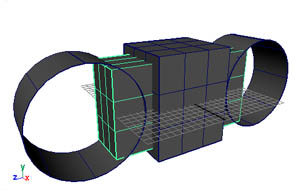
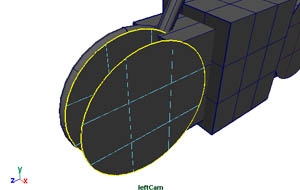
We finish the basic shape by adding caps to the cylinder. The caps are planar surfaces build out of the outer isoparm of the cylindher.
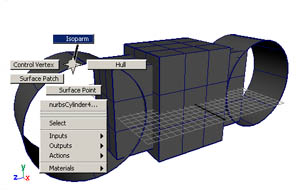
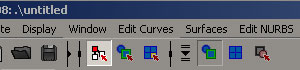
On the cylinder surface invoke the component marking menu by pressing
the right mouse button ( rmb ) choose isoparm.
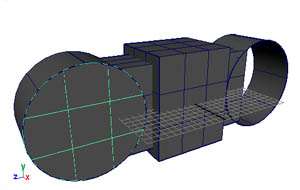
Select the edge of the cylinder, it should turn yellow.
Create the cap by choosing menu » Surfaces » Planar.
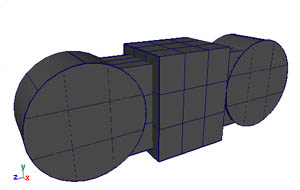
repeat this for the second cylinder.
We model the handle with an extrude, a profile circle along a path curve. The symmetry allows us to model a half and mirror it.
Go to the view showing the front of the roller and hit space to hide the other views.
We start with creating the lines. There are three ways of creating curves, you can define it by it's control vertices (CV) by it's edit points (EP), which we use here or by creating an arc.
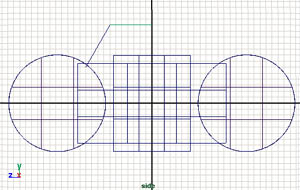
Select Create » EP curve tool . We create two
separate lines, one sloped from the cylinder and a horizontal one.
Hold the x key to snap to grid points, while picking points.
Finish the curve with the enter key.Repeat this for the sloped
curve.
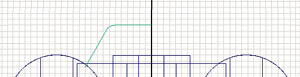
Now we attach the curves with a fillet. Select both curves.
Choose Menu » Edit Curves » Curve Fillet ( pick
the square to invoke the options window ). In the options window change the
default settings of the fillet to trim and join, and press the fillet button.
![]()
If the fillet radius is to small change it in the channelbox. ( INPUTS > filletcurve > radius ) Instead of entering values you can click on the text radius, it turns
black. Now in the 3D window you can drag with the mmb to change
it's value.
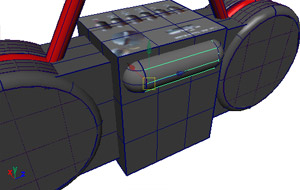
Create a new nurbs circle for the profile. Move it anywhere outside the cube,
so you can select it more easily.
Select the circle first then the handle ( path ) curve.
Choose Menu » Surfaces » Extrude . Check
Tube, At path, Component and Profile Normal. ![]()
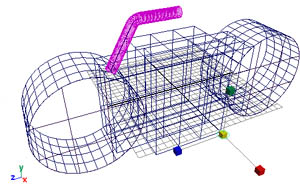
Dupicate and mirror the handle.
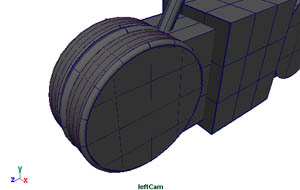
In this section we add more details to the speakers. We delete the initial cylinders and replace it with a torus as apart of the handle. Two new cylinders are created by a loft.
Pick one of the speakers, we duplicate the result later.

Select the cylinder and delete it with the backspace key.
Create a torus primitive and scale, rotate and move it in place. With the height ratio property (in the panel box on your right, under INPUTS) you can adjust the thickness to the handle.

Duplicate the planar and move to the torus.
With a loft between the planar we create a new cylinder. A planar creates a trimmed nurbs, which you can see if you look at the straight isoparms, the round edge is a trimedge.
On the planar invoke the marker menu with the rmb and pick trimedge.
Select the edge and pick the edge.
Repeat this for the second planar, but shift select the second edge.

With the two edges selected, create a loft ( Surfaces » Loft ).
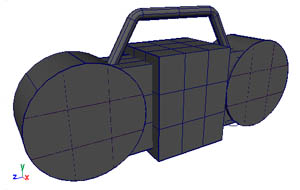
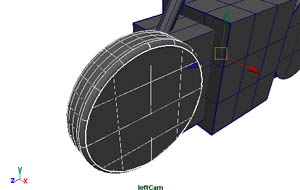
Now we use the round tool to round the sharp edges.
Hide the torus ( ctrl-h ). Make sure nothing is selected, and
pick the round toolMenu » Edit Nurbs » Round Tool ). The
round tool needs two surfaces. Drag a fence on the edge.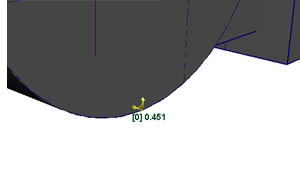
With the yellow manipulators you can adjust the round radius. Repeat this step for the inner corner. Finish the round with the enter key.
Use the 3 key to set the smoothness to fine.
Now the front of the speaker consists of five surfaces, we organize them in a group, so they are easily copied to the back and other side.
Select the surfaces and group them with Menu » Edit » group.
Use the outliner Menu » Window » Outliner or the Select by Hierarchy and Combinations button to select groups.
Duplicate the group, and mirror it in the z-axis to copy it to the
back. Unhide the torus ( ctrl-shift h ).
Delete the surfaces of the other speaker. Copy the new speaker groups to the other side as above.
Duplicate and move the torus.
We prepared a few materials, called shaders in Maya, in the material tutorial you learn to create your own shaders.
In the Hypershade you see a red, grey and textured materials, for the speakers, front and top.
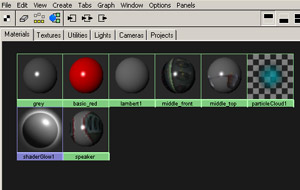
Open the Hypershade, Menu » Windows » Rendering Editors.
If you don't see the shaders here, choose File » Import . in the shader folder of your project pick
the roller_shaders.ma .
In the 3D window select both handle surfaces and the two torus surfaces. With the mouse on the red material in the hypershader, select rmb » assign to selection.
Select all other surfaces( with group select ) and assign the grey shader.
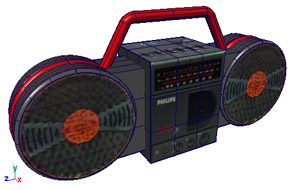
Now select the two front surfaces of the speakers and assign the speaker shader.
Assign the front and top material to center cubes front and top.
If you don't see any textures, select Panel Menu » Shading » Hardware Texturing or press 6.
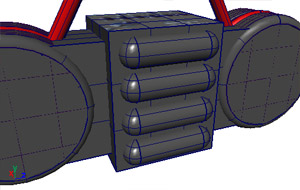
On the back we add four rounded cylinders. We start with a sphere, cut it in two and loft it just like the speakers.

Create a sphere and move it to the back. Scale it so four spheres fit verticaly.
Select the center vertical isoparm (rmb) and choose Edit Nurbs » detach
to cut it in two. If the sphere doesn't split, you have to rotate the sphere
180 degrees around the y-axis; and detach it again.
Move the half sphere's off center to the edges of the box.
Select both edge isoparms and create a loft. You can stil move the half spheres.
 Group
(
Group
( ctrl-g ) the half spheres and duplicate move the group to create
three duplicates. If the duplicates don't move nice it's probably a history artefact. The cylinder is defined as the loft between the spheres
, move two spheres and the cylinder follows. Delete the history to remove this relation( Menu » Edit » Delete by type history)
Assign the gray material.
You can enhance the looks by rounding of the center box.