
This tutorial is intended for industrial design students at
the tudelft.
Version 1.0, Maya version 8
Comments to d.p.saakes@io.tudelft.nl
© Paul Baak, Daniel Saakes. TUDelft 2007
All rights reserved.
This tutorial is intended for industrial design students at
the tudelft.
Version 1.0, Maya version 8
Comments to d.p.saakes@io.tudelft.nl
© Paul Baak, Daniel Saakes. TUDelft 2007
All rights reserved.
Up till now you have been lighting your scene with spotlights, directional lights point lights etc. All types of directional light. In real life, unless your standing in the sun or in the spotlights, nearly everything is lit indirectly. Light enters a room through a window, bounces off the walls, ceiling and floors to illuminate the interior.
Final Gather is one way of simulating indirect lighting. In a basic Final Gather set up, there is no direct light source present. All light information is generated from the 'environment'. The presence of objects play an important role in how the light distributes through your scene.
First, open a new scene. Create a Nurbs sphere on the grid. Diameter approx. 4.
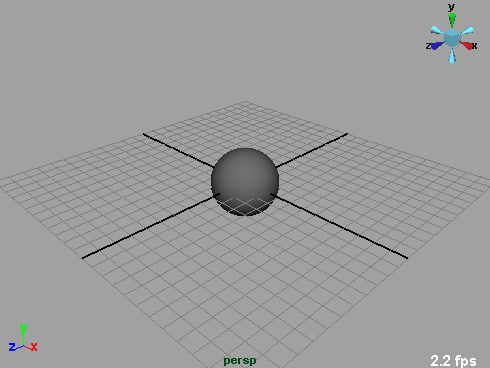
Render the perspective view.

Nothing special yet.
Open the Render Settings Window.
On the common tab choose: Render Using: Mental Ray.
On the Mental Ray tab choose quality preset: Production.
 Basically the same rendering, but we need Mental Ray because it can do ~Final Gather~.
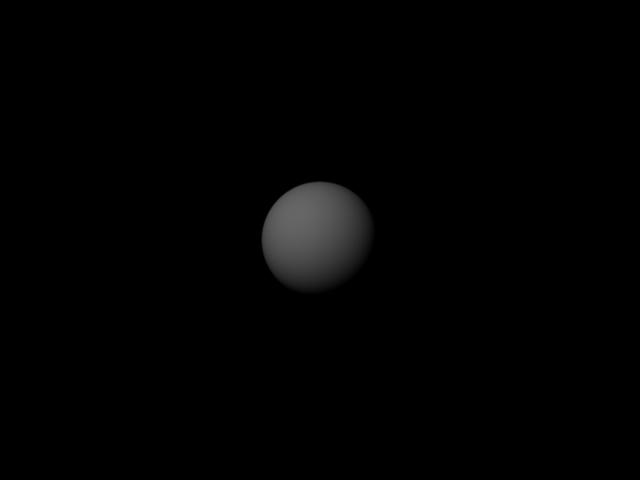
On the common tab under render options, disable default light.
Render the scene again.

All black. I bet you saw that one coming.
In the Perspective panel choose View>>Camera Attribute Editor.
Under Environment, drag the background color slider to white.
Render the scene.

Theres our sphere again. Still black because there are no lights, but this time against a white background.
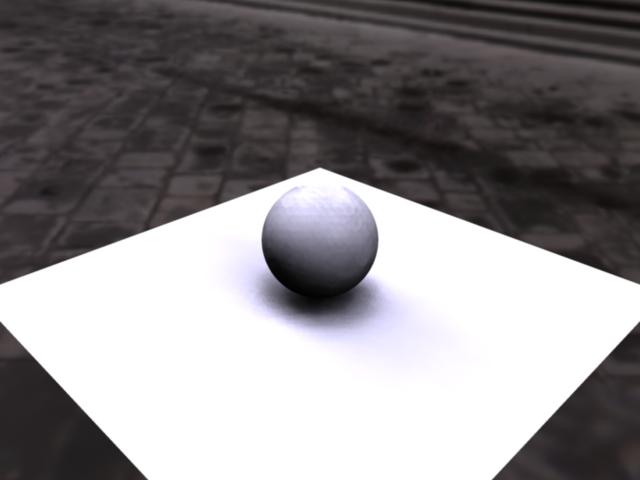
Now we shall turn on the Final Gather.
On the Mental Ray tab in the Render Settings window, enable Final Gather. Put the number of Final Gather Rays at 100 if they arent already. Dont bother with the other settings yet.
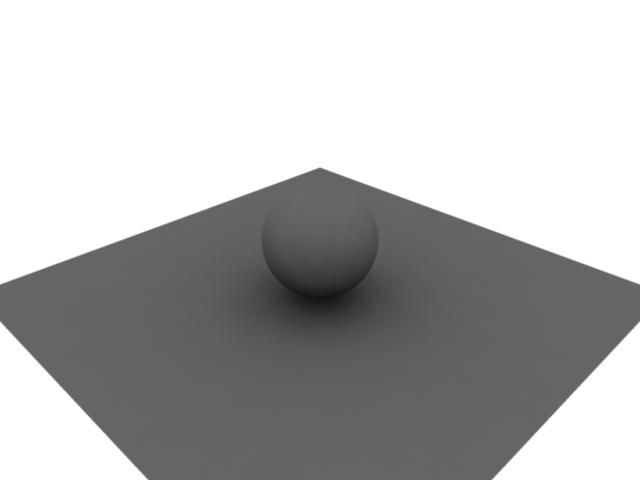
Render the perspective view.

Enjoy! Your first Final Gather rendering is a fact (I presume its your first). Though the sphere looks a bit flat. More like a grey dot. This is because of the uniform white environment. It wouldnt matter which side you rendered it from. The sphere is lit equally from every direction. Ever seen a product photography studio? They try to mimic this diffuse lighting from all directions. Take a look at http://www.cubelite.com.
Final Gather isnt part of any of the standard quality presets (except for the Preview Final Gather) If you change your quality setting youll have to enable Final Gather again.
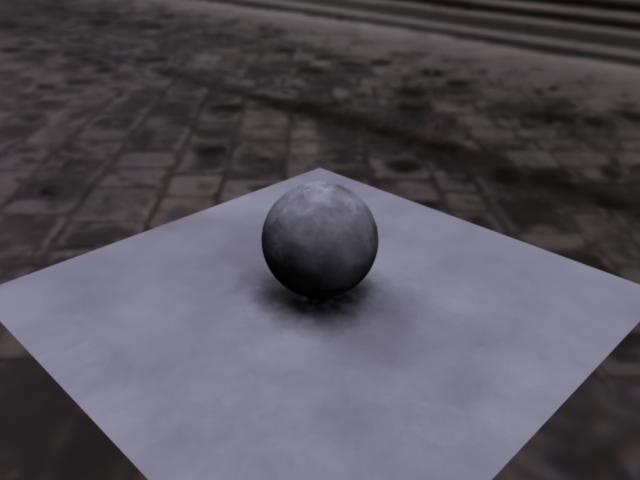
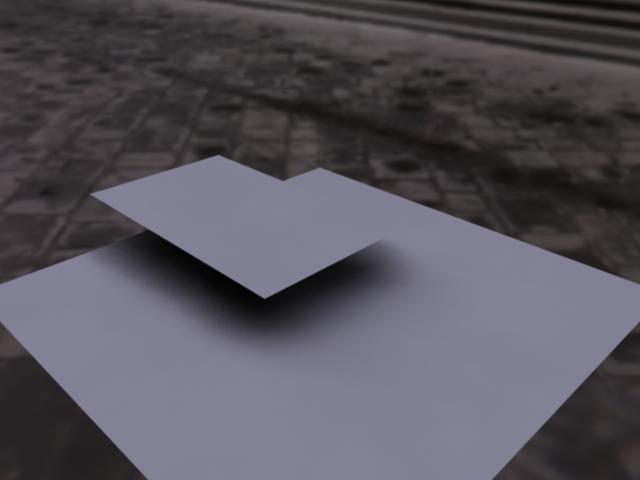
To make the sphere a bit more interesting we have to create some depth and contrast. Lets do so by blocking the light coming in from below. Lets put a floor under it. Create a Nurbs Plane and position it so the sphere sits on it. (Either move the plane down or the sphere up a bit.).
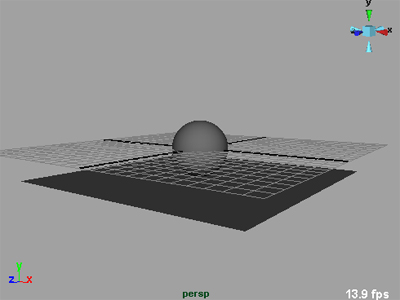
Render the perspective view again.
Nice isnt it? Such a smooth shading with so little effort. Although the scene is still lit equally from all sides, the plane blocks the light coming from below giving the sphere some depth. Also the sphere blocks the light from above, making a shadowy spot on the plane. Try adding some walls or panels around the sphere to see what effect they have on the lighting situation.
Instead of making a uniform white background we can use an image of a real environment to provide the lighting information.
On the Internet go to: www.debevec.org/Probes and download the light probe of the Uffizi gallery, the one with the .hdr extension. It looks like a Christmas ball.

The Uffizi light probe is made at the Uffizi gallery in Florence, Italy. It is a 360 degree view of the area. This means you can use it as an environment for your 3d scenes. Next to that it is a HDR image. It contains sufficient light information to use it as a light source in a 3d application. This is a shot of the area from above, to give an impression of where we are.

Paul Debevec is CG lighting pioneer and guru. If you want to now more about what High Dynamic Range is, or how these light probe images are made, take a look at his site: http://www.debevec.org
In Maya open the Render Settings Window and on the Mental Ray tab, go to Image Based Lighting. Click on Create.
This creates an IBL (Image Based Lighting) sphere (the one with a yellow wire frame) in your scene and opens the Attribute Editor that goes with it.
At this point the IBL sphere has no image attached. To do so, in the Attribute Editor, click the folder icon next to Image Name under the Image Based Lighting Attributes of the IBL Sphere. Locate your just downloaded Uffizi_probe.hdr and open it.
Change the Mapping to Angular. There are a number of ways to map a surface of a sphere onto a square plane. This Uffizi Probe uses an Angular Mapping.
Scaling and positioning the sphere has no effect because at render time it is considered as being infinitely far away. Rotating however does change the orientation of the sphere.
If you ever loose track of your IBL sphere, you can find it in the Hypershade on the Lights tab.
Render the Perspective View.
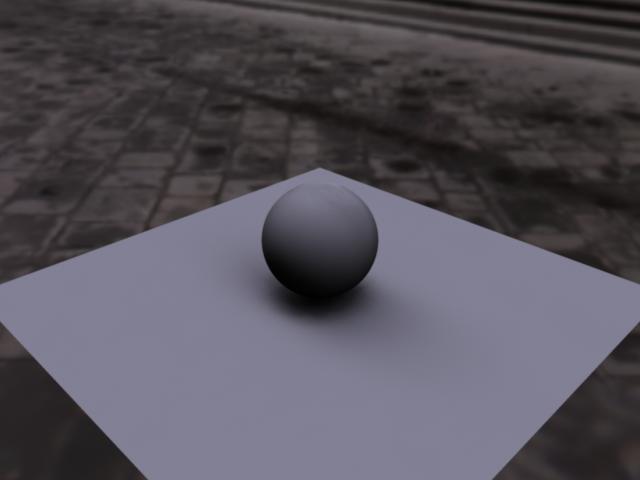
Tadaaaa, the sphere and the plane now have the lighting as if they were present on the Uffizi gallery on the specific day and time the probe was made. It only seems to be over exposed a bit. The sphere and the floor still have the default gray material assigned to it, remember?
On the Mental Ray tab under Final Gather, you can adjust the Final Gather Scale. This adjusts the light intensity involved with Final Gather for the entire scene. Drag the slider to about 50 % and render the scene again. It should look like default grey objects.
When the Final Gather Scale slider is on 1 and you still havent got enough light to your likings, you can increase the value beyond the slider scale. To do so double click on the color swatch next to the slider. This opens the Color Chooser. Here you can numerically enter a value greater than 1 in the V (value) box. Try 100, it should really blast you away.

The sphere again, looking approximately default grey.
The important settings that determine the quality and look of your Final Gather are the Number Of Final Gather Rays, and the Min and Max Radius.
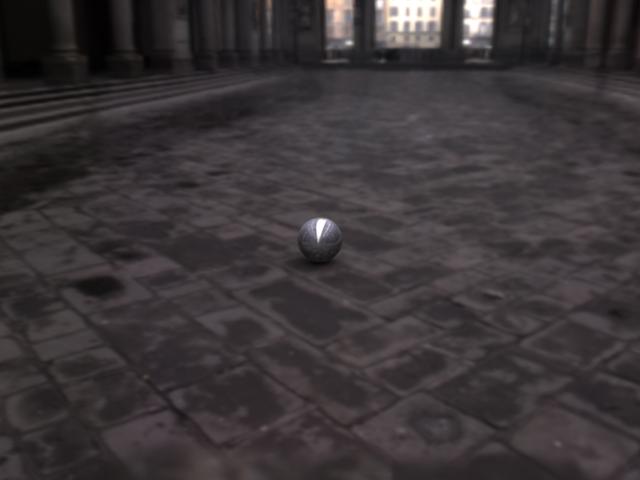
As you probably noticed, the sphere and plane look a bit smudgy. The number of Final Gather Rays is too low. The effect becomes more apparent when we drop the number of rays to 10.
This image has only 10 FG rays.
This image has 1000 FG Rays. The spottiness seems nearly all to have gone. How many do I need you might ask. Well, just enough to make the smudginess gone.
For the Max Radius the rule of thumb is 10% of the size of your scene (a grid square is 1x1 default). The accompanying rule for the Min Radius is 10% of the max Radius. However, there is quite some room to fiddle with these figures.
Main effect is that increasing Max and Min Radius will make shadows softer. Decreasing the Radii makes everything sharper.
Making the radii smaller will again introduce some spottiness, so additional Final Gather Rays are needed, at the expense of a longer render time.
This rendering has a Max and Min Radius of respectively 2 and 0.2.
This Image has a Max and Min Radius of respectively 20 and 2
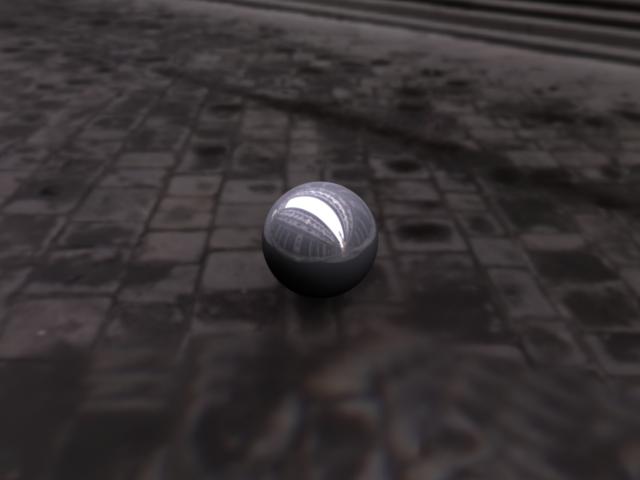
Now we can make the sphere shiny. Open the Hypershade and create a new Phong material. Locate the Reflectivity slider and drag it all the way to the right.
Assign the Phong to the sphere and render the scene.
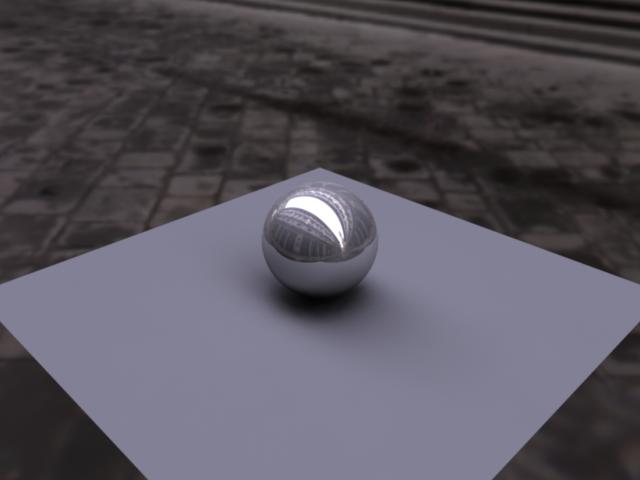
Aha, now we can see what the surroundings look like. Welcome in Italy!
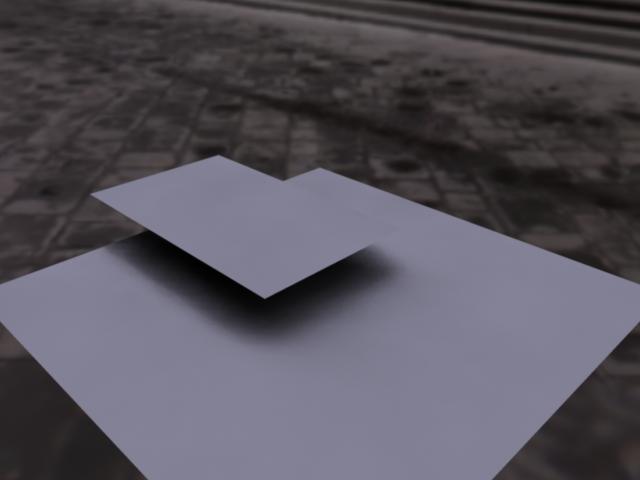
Now wouldnt it be nice if we could get rid of the grey plane. But if you delete it, it looks like this:
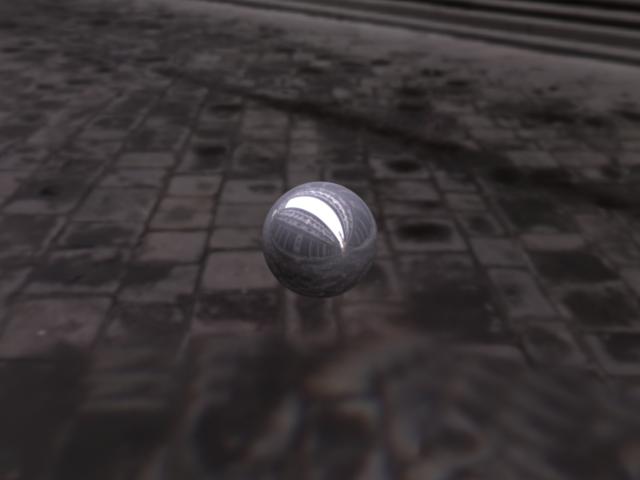
The sphere seems to be hovering in mid air. Which is actually the case because also the floor of the Uffizi gallery is considered infinitely far away. If we want it to look like it is lying on the floor we need something that catches a bit of shadow under the sphere.
If you too deleted the plane, bring it back (press z). In the Hypershade, create a new material of the type Use Background and assign it to the plane. It should turn green in the view port.
Render the scene again.
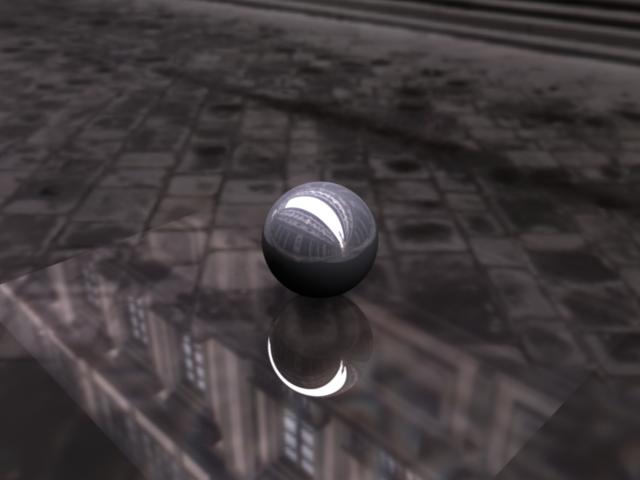
Theres definitely a plane underneath it. All we have to do now is to remove the reflectivity of the Use Background material. Open the Hypershade and double click the Use Background to open its attribute editor.
In the UseBackground Attributes, slide the Specular Color, Reflectivity and Reflection Limit all to 0. Render!
This looks fairly decent. Though at close inspection the reflection on the bottom of the sphere is still coming from the plane with the use background material.
To remove this, select the plane (not the material), and press ctrl-a to access its attribute editor.
Under Render Stats, disable Visible in Reflections. Render the scene one more time.
With a different perspective the sphere appears to be large while actually it isnt. You can play with the framing of the shot to adjust your background.
There are plenty opportunities to make a more realistic and believable scene. But dont forget that this is the result of very little effort compared to trying to achieve a similar result with direct lighting.
To set up a Final Gather Render:
OR Create an IBL sphere and attach a texture.OR Set your Camera Background Color to white.