compositing tutorial
by Maarten Gribnau
Updated for Maya 6 ( Daniel Saakes )
1. Introduction
This document will introduce you to the art of rendering a Maya model on top
of a background image (or compositing). There are basically two ways to do it
(that are both covered in this single tutorial)
- Render your model in Maya and import both the rendering and the background
image into an image editing application. Here, the background image only serves
to set up the lights and the camera.
- Import your background image into Maya and render your model on top
of the image. Here, the background image helps you to set up the lights and
the camera and serves as background of the final image too.
Deciding whether to do compositing in Maya or in an external editor is difficult
since it depends on the complexity of the compositing and your experience with
image editing applications such as Adobe's Photoshop. Hopefully, this tutorial
will help you to decide what is most appropriate in your situation.
We suggest you will you Mental Ray as your renderer instead of the Maya software renderer. This is the only technique to catch shadows and reflections in external compositing tools.
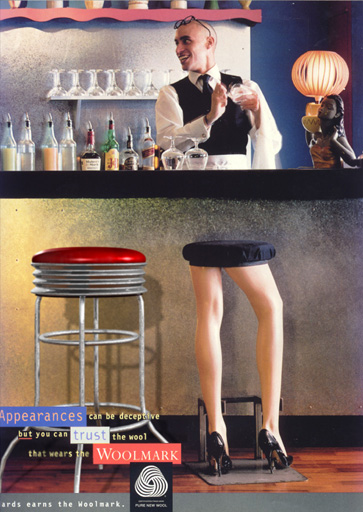
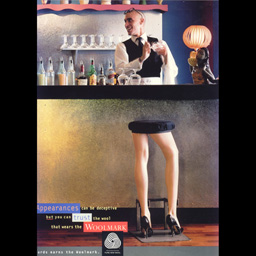
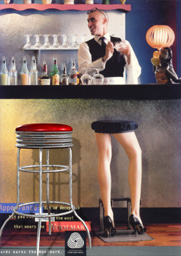
Result of merging a stool with a background image
2. Scanning
Both techniques have one thing in common: you need a background image. If you
have an image in print (magazine advertisement for instance), you will need
to scan it. For the IDE521 course, you will need to scan the image with its
largest dimension equal to 1024 pixels. If your image has a landscape layout
(image width is larger than the image height), than the width of the
scanned image should be equal to 1024 pixels. If your background image has a
portrait layout (the image height is larger than the image width), than
the height of the scanned image should be equal to 1024 pixels.
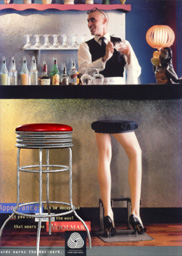
Dimensions of images in landscape (left) and portrait layout (right).
One tip: background images in Maya work best when they have a landscape layout.
If your background image has a portrait layout, make the image square while
working with Maya and restore the original layout in the end.

Original background image (left) and square version for working with Maya (right).
3. Setting up
You will use an existing project directory that you need to copy to your own home directory. The project contains the scene and image files you need in the following lesson.
- Download the tutorial files here
and unzip them.
- Copy this directory to a location in your home directory (H: drive) After
starting Maya, set the tutorial directory as the current project directory.
This will help you to locate the scene and texture files. Select
File
» Project » Set
. Then locate and select the tutorial directory
you just copied to your home drive. Press ok. You will now open the scene
file with the geometry of the stool that you will be working with in this
lesson. Then you will set a panel lay-out that is convenient for compositing.
- Select
File » Open Scene
.
- Select the file compositingStart.mb in the file browser. In case you wonder
why the file browser opens in the correct directory; this is because you have
set the current project directory in the previous step.
- In the view panel menu bar, select
Panels » Layouts » 3
    Left Split
.
- Create a new camera that you will use to render images with. In the left panel menu choose
Panels » Perspective » New.
- Set the side views to and another Perspective View with the new camera (camera1) and a Render View panel.
- In the view panel menu bar of both Perspective views, make sure that Smooth Shade All and Hardware Texturing are both turned on (you can press 6 on the
keyboard to turn both options on for the view currently active).
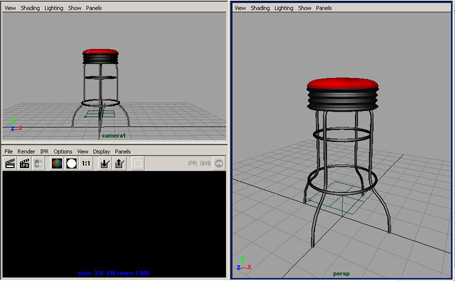
Recommended layout for this lesson
4. Importing the background image
We will now import the background image and use it as a background for the
camera we just created. The image will be used as a reference for positioning
the stool and to set up the lights.
- In the view panel menu bar of the Perspective View of camera1, select View » Select
Camera. Open the attribute Editor (press Ctrl-A on the keyboard or select
Window » Attribute Editor
). The Attribute Editor now shows the
attributes of the camera we will use for rendering. You will add a background
image to this camera.
- In the view with the new camera choose:
View » Image Plane » Import Image... and choose the woolmark1kSquare.tif
- The Attribute Editor now shows the attributes of the newly created image plane. Click on the button with the folder icon and select woolmark1kSquare.tif.
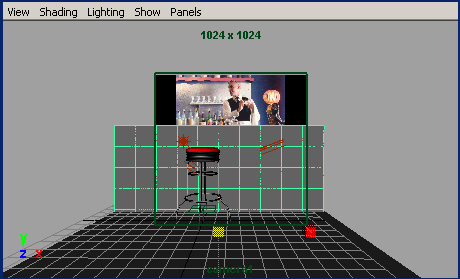
- You will notice that the image plane is visible in both Perspective Views. If you zoom or navigate in the Perspective View of camera1, you will notice that the background is fixed to the camera.
- It may happen that not all of the background image is visible. To prevent problems, open the Render Globals window and set the Render resolution to 1k Square. With that setting, images will be rendered with a resolution of 1024 by 1024 pixels. Now that you have the Render Globals window on the screen, you can set the camera to use for rendering. In the Image File Output section (the first section), select camera1 as camera.
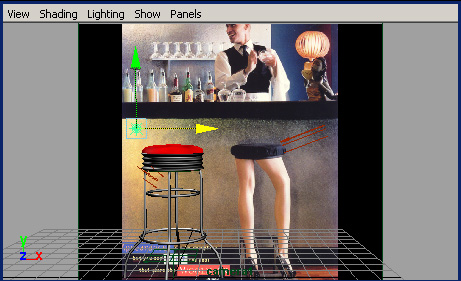
- Navigate in the Perspective view panel of camera1 until you have a good match between the stool and the background image. You may also want to scale the stool or change the Focal Length of the camera to get an optimal match.
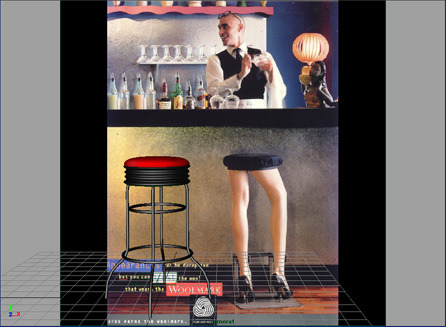
Perspective View of camera1 after positioning the camera
5. Adding lights
You will now set up some lights in the scene to match the light conditions
of the background image. If you look at the background image, you see light
coming from the right side of the picture. This is probably daylight entering
the bar. From the shadow of the legs on the bar, you can deduce that light is
coming from a position somewhat left to the camera. There is also a light source
on the left side of the bar. We will try to match these light sources in Maya.
- Select the Rendering menu set (Use the drop down box in the upper left corner
of the screen or press the F5 key on the keyboard). Select
Create » Lights » Directional
    Light
to create a directional light in the scene
- To see the effect of the light select Lighting » Use All Lights from the view panel menu bar of both Perspective Views. Now we will move the light such that it creates the same effect as the incoming daylight
- To position the light, you can use Mayas standard Move and Rotate tools in the Perspective view (of the persp camera). Remember that the position of a directional light has no influence on the lighting of the scene, only the orientation matters
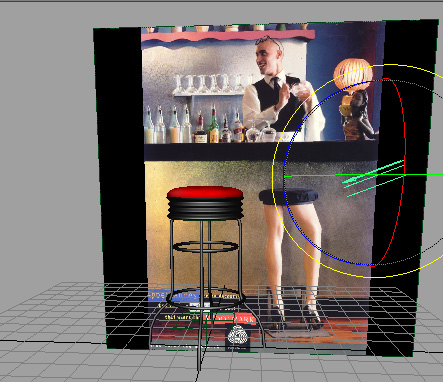
Positioning the directional light that simulates incoming daylight
- Create another directional light and position it such that it will create
a shadow on the bar that matches the shadow of the legs. Select
Create » Lights » Directional
    Light
.
- Instead of using the Move and Rotate tools, you will now use another method
for positioning the light. From the view panel menu bar of the Perspective
View of the persp camera, select
Panels » Look Through Selected
(with the new light selected). Now you are looking at the scene from the position
of the light. Navigate the view with Mayas navigation method (Alt key and
LMB and/or MMB).
- When you are done, select
Panels » Perspective » perps in the view
panel menu bar of the view you just navigated. Now the default perspective
camera is active in the panel.
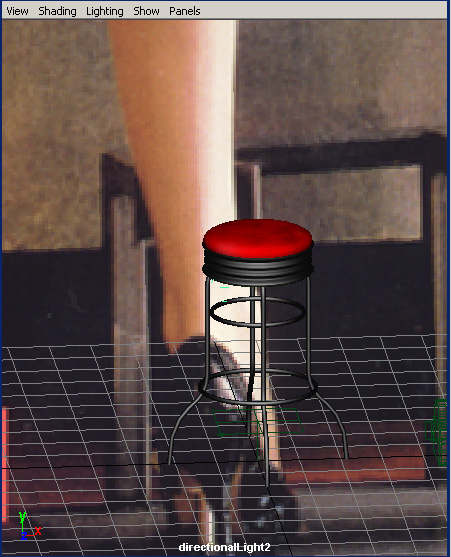
Looking through the directional light
- The last light you will add is a point light that matches the light coming
from the left side of the bar. Select
Create » Lights » Point Light.
A point light is created in the origin. Remember that for a point light, orientation
is not important.
- Use Mayas Move tool to position the light somewhere on the left side of the
bar.
Point light after positioning
- You might notice that the lighting of the stool is getting too bright by now. You can adjust the intensities of the light sources to reduce the amount of light from each light. In either Perspective View, select each light and use the Channel Box or the Attribute Editor to reduce the Intensity (to a value between 0 and 1).
6. Adding shadows
Now you will add planes to catch the casted shadows on the bar.
- Create the floor. Select
Create » Nurbs Primitives » Plane ?.
In the channelbox scale it to 20. Move
the floor into the scene and align it with the ends of the legs of the chair.
You may need to switch between wireframe display (select Shading » Wireframe
or press 4 on the keyboard) and shaded display (select Shading » Smooth Shade
All or press 6 on the keyboard) a few times.
- Create the bar surface. Again,
selectCreate » Nurbs Primitives » Plane
    ?
and set both width and height to 20. Rotate this plane 90 degrees
around the X axis (in the Channel Box, set Rotate X to 90). Move this plane
such that it aligns with the top of the bar.
Floor and
bar surfaces after positioning them in the scene
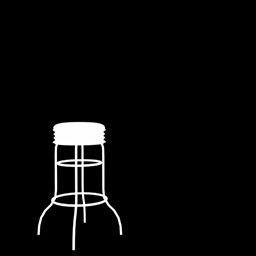
- You will now create a useBackground material. This material will then be
assigned to the floor and bar surfaces. After applying the material, the background
image will be visible on the surfaces and shadows will be rendered on them.
Open the Hypershade window (select
Window » Hypershade).
- Create a new useBackground material. MMB drag the useBackground material
from the Create section of the Visor to the work area.
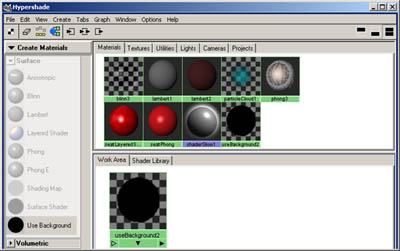
Creating a useBackground material
- Assign this material to the two surfaces. In a Perspective View, select
both surfaces. In the Hypershade window, RMB click on the icon of the useBackground
material and select Assign Material To Selection.
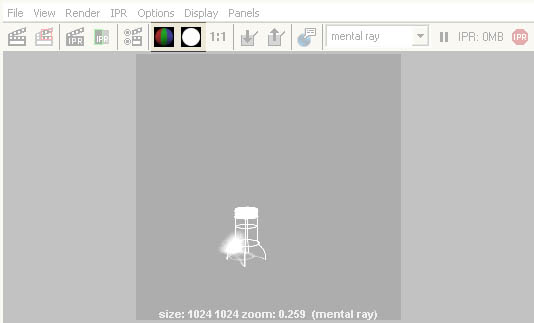
- Render the scene in the Render View. In the view panel menu bar of the Render
View, select
Options » Test Resolution » 25% Globals (256x256).
This will make Maya render at 25% of the resolution of the final image in
the Render View. Now select Render » Render » camera1.
- You will notice that there are no shadows yet. We will have to use the Attribute
Editor turn on shadows for each light. In a Perspective View, select the light
shining from the right. Open the Attribute Editor and open the Shadows section.
Turn on Raytrace shadows. Render again and you will notice that shadows
appear on the floor ( make sure raytracing is enabled in the render globals! ). You may want to rotate your light to align the shadows
with those that are cast by the other stool in the scene. In the attribute editor of the use background material you can turn down the reflectivity.
- Repeat the procedure for the other directional light. Turn on Raytrace
Shadows and rotate the light such that the shadows match those of the
stool in the image. When rendered, the shadow of this light will look a bit
sharp. In the Attribute Editor, change the Light Angle and increase the amount of shadow rays. That
will make the shadows look a bit softer on the edges.
The effect of Light Angle and Shadow Rays : sharp shadows (left) and soft shadows (right)
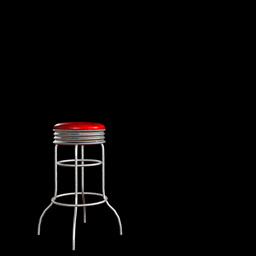
- The final step is to use the batch renderer to render the scene with full
resolution like you did before. First we need to set the type of image we
want to have rendered. Open the Render Globals window. In the Image File Output
section, select Tiff (tif) from the drop down list. Enter stoolFinal as name
for the image.
7. Rendering for compositing in an external program
Sometimes you want to composit your render in an external program like Photoshop.
copyright 2000 Maarten Gribnau; TUDELFT.