This tutorial is intended for industrial design students at
the TuDelft.
Version 1.0 Maya version 6
comments to d.p.saakes@io.tudelft.nl
© Aernout Peeters , Daniel Saakes, TUDelft 2003
All rights reserved.
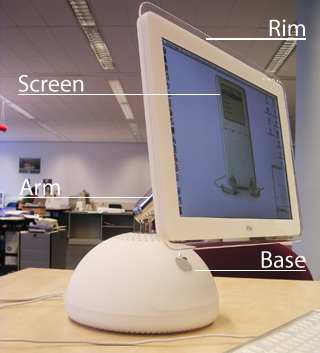
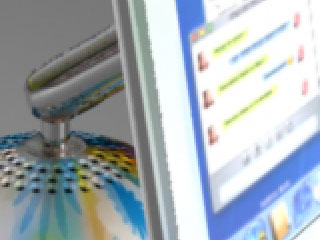
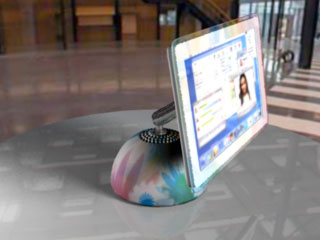
In this tutorial you will render the Apple iMac. The iMac consists of a base of white plastic, an arm of chrome metal and a screen with a transparent rim.
The renderings you made so far were in low resolution, 320 by 200 pixels. You also noticed pixel effects.
In this final part of the tutorial you will create high resolution images for product presentation. After this part you should be able to:
If you start here open the start_rendering.mb file in the
tutorial project.
First import a material. Choose File > import and locate
screen.ma.
In the hypershader you notice a new material node called screen. Drag this
node with mmb on the screen surface in your perspective view.

In the render globals window you can set most rendering options. In this window you see two tabs; in the first tab you can set the resolution. For presentational images you typically set the resolution to 1024 x 768 for screen or higher for printing.
Render the image. Notice the increased render time.

The image you rendered is to big for the image view. You can scale / pan the image with the default camera controls, however you can only judge the quality of an unscaled image. Use the 1:1 button.
Save the image in the render view with Panel Menu » File » save Image The standard output format for Maya images is the iff format; which is not very common. Choose jpg or tga / tiff. Targa (tga) or tiff images have an additional advantage : extra information will be saved which you can you use to select objects in photoshop which will be shown in the compositing tutorial.
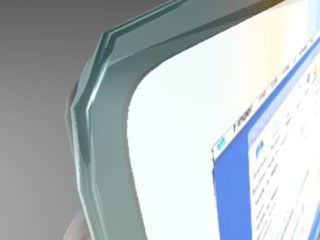
Some parts of the iMac still show glitches in the rendering due to bad nurbs tesselation. Nurbs are converted to triangles during the rendering process. Adjacent surfaces with different surface parameters can have different triangulations causing unaligned edges. We can improve the alignment by changing the tesselation settings. First you will do it by hand; then you will use the automatic method.
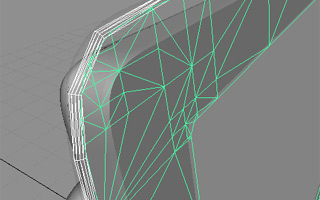
Move your camera to a view a corner of the monitor of the iMac. Select the
corner surfaces one by one and in the attribute editor of each surface activate
the "display render tesselation". Now you can see that
the corner does not align very well when triangulated.
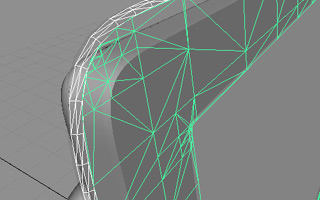
In the attribute editor increase the U Divisions Factor and the V Divisions Factor
and observe the tesselation in the view.
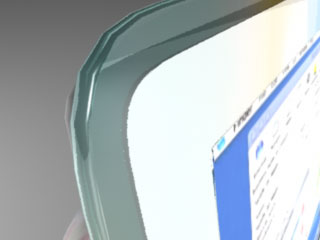
Increase the tesselation both surfaces. And render again. Most of the glitches should be gone, otherwise increase and render again.
Extreme tesselation values can also increase your render time; so do it with care.
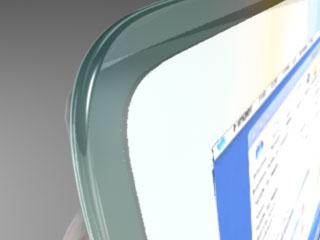
Maya can automaticaly calculate tesselation values for a surface based on
the distance to the camera or cameras. In the menu(render) choose
Set NURBS tesselation 
Activate the Apply Tesselation to Selected Surfaces and select the two surfaces in the scene. Press the Apply...
Observe the result in a rendering. Note that you have zoomed in on this part
with the perspective camera; since the automatic tesselation is camera based
it will be set higher than needed for our detail and overview cam.

Until now your images were very pixelated; The pixelated effects in the image
need anti aliasing. You need to render the image in high quality. Open the
render globals window. In the mental ray tab you find
the Quality Presets menu at the top. Chang it to production quality and render again.
The overall quality has increased significantly, due to an increased quality in raytracing and the use of anti-aliasing.
Anti aliasing, like high resolutions and raytracing can take a lot of time to calculate and the Production Quality setting is typically used in the final stages of the visualisation process.
here might come a small thing about showing the hall picture in the background
the end